MeritMade Lessons - How to Create a Silver Bead


Silversmithing techniques as we know them today date all the way back to 4685 BC.  Needless to say the craft and techniques are steeped in rich history and tradition.  However, many of these techniques are now being replaced by machines and computers. Like with all technological advancements this can save huge amounts of time and effort.  However at MeritMade, we strive to respect the craft and stay true to the process by performing many of these techniques in the same way that they have been for centuries. 

One particular technique that is rarely used anymore, is the process of hand fabricating hollow silver beads. Machine made silver beads are prevalent in today's market and can easily be purchased through any bead or craft store. If we look to our past though, we can see some amazing pieces created with hand fabricated beads. Some of the best examples being in Native American jewelry. In this post we will walk you step by step through the process used to create a silver bead.    

native american silver beads
native american jewelry

 STEP 1 - Cut out from thin gauge silver sheet the appropriately sized circle. 

discs cut from silver sheet

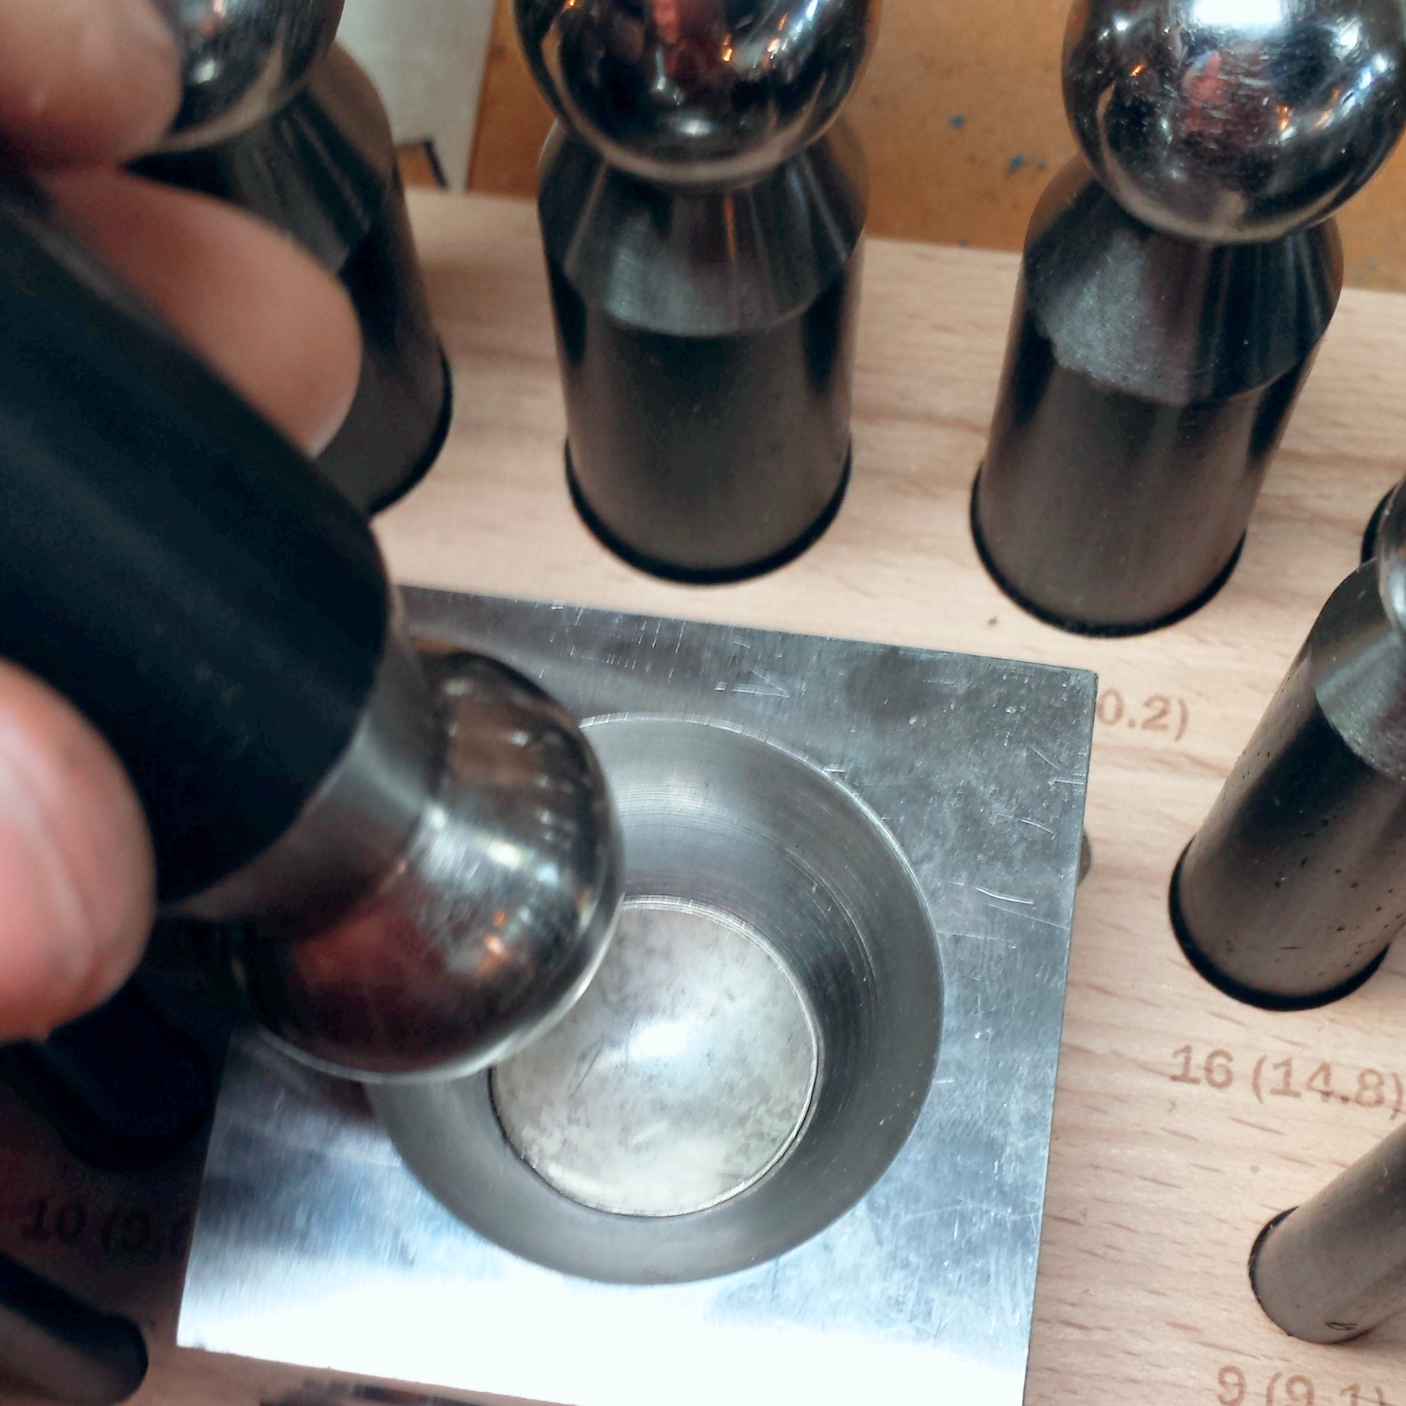
STEP 2 - Start shaping and doming the silver using punches and a dapping block (here is a great video by Rio Grande that explains the process)

Using a dapping block
slightly domed silver disc

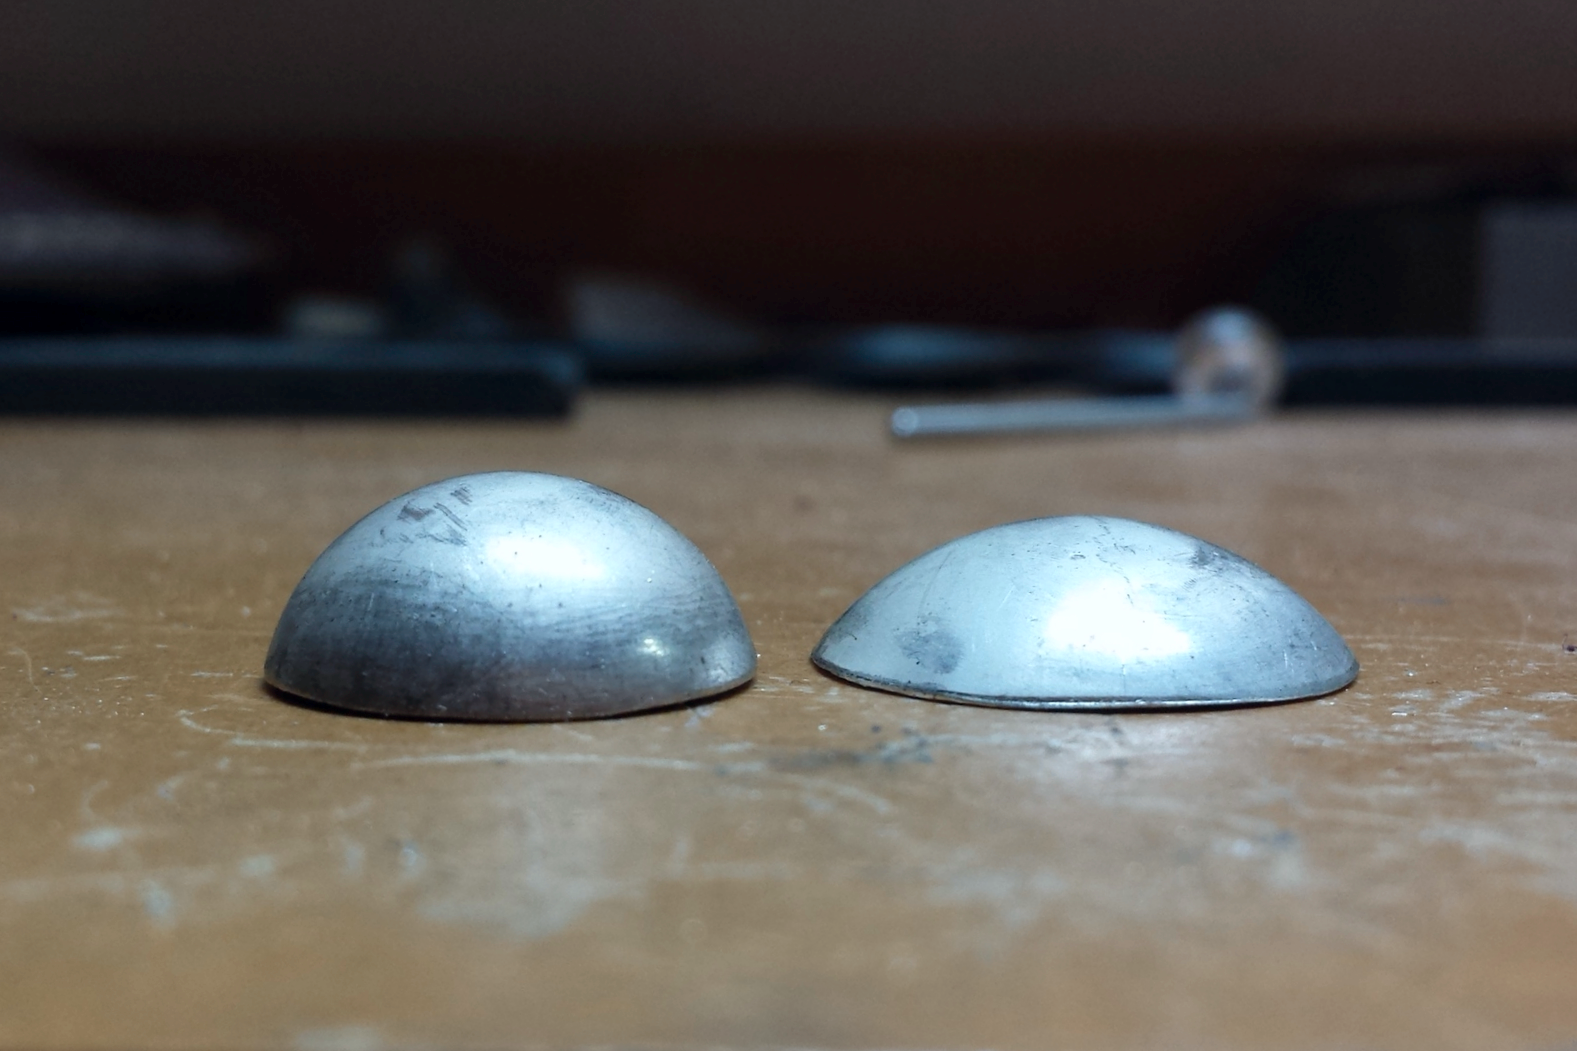
STEP 3 - Gradually work the silver step by step into the smaller sections of the dapping block. Slowly the depth of the dome will increase. 

dome height comparison

STEP 4 - Repeat Step 3 as many times as needed to get to the desired dome height. As the metal starts to harden from the hammering, you will need to periodically stop between rounds and anneal it to make the silver soft again. (For a great annealing tutorial check out this video)

STEP 5 - Once the domes are the height you want them, use a flat surface and coarse sandpaper to sand the the flat side completely level.  

STEP 6 - Create a hole using a drill bit in each dome. Be sure to create the hole large enough for the chain or string that the bead will go on to. 

half domed silve with hole to become a bead

STEP 7 - Now you need to solder the two domed halves together. (Want to know more about soldering? This video is a good start)

soldeing a silver bead together

STEP 8 - Clean up the edges and any extra solder that might have melted in the wrong place.  Lastly perform any final finishing, polishing, and/or patina.  VIOLA! One Bead Done!!

I'd love to hear any feedback or questions about this post.  Was it interesting?  What other techniques or processes would you like to see? 

Interested in purchasing this silver bead necklace, hop on over to the shop! 

- Kelly

MeritMade Stories - Nick


What is your MeritMade story?
I commissioned a beautiful bracelet for my wife, Christina, to commemorate our 11th anniversary.

Why did you choose to work with MeritMade?
Because the owner is a badass

How does working with MeritMade compare to buying jewelry in the past?
A way, way, way, better experience. I hate buying jewelry because budget immediately segregates you in a jeweler's eyes.

If you could get another piece of MeritMade jewelry for free, what would you want?
Man Jewelry.

What is the best movie quote ever, and what movie is it from?
"Shitter's full" - Cousin Eddie, National Lampoon's X-mas Vacation.

Anything else you would like to add?
I love MeritMade!

-Nick


Maker's Notes

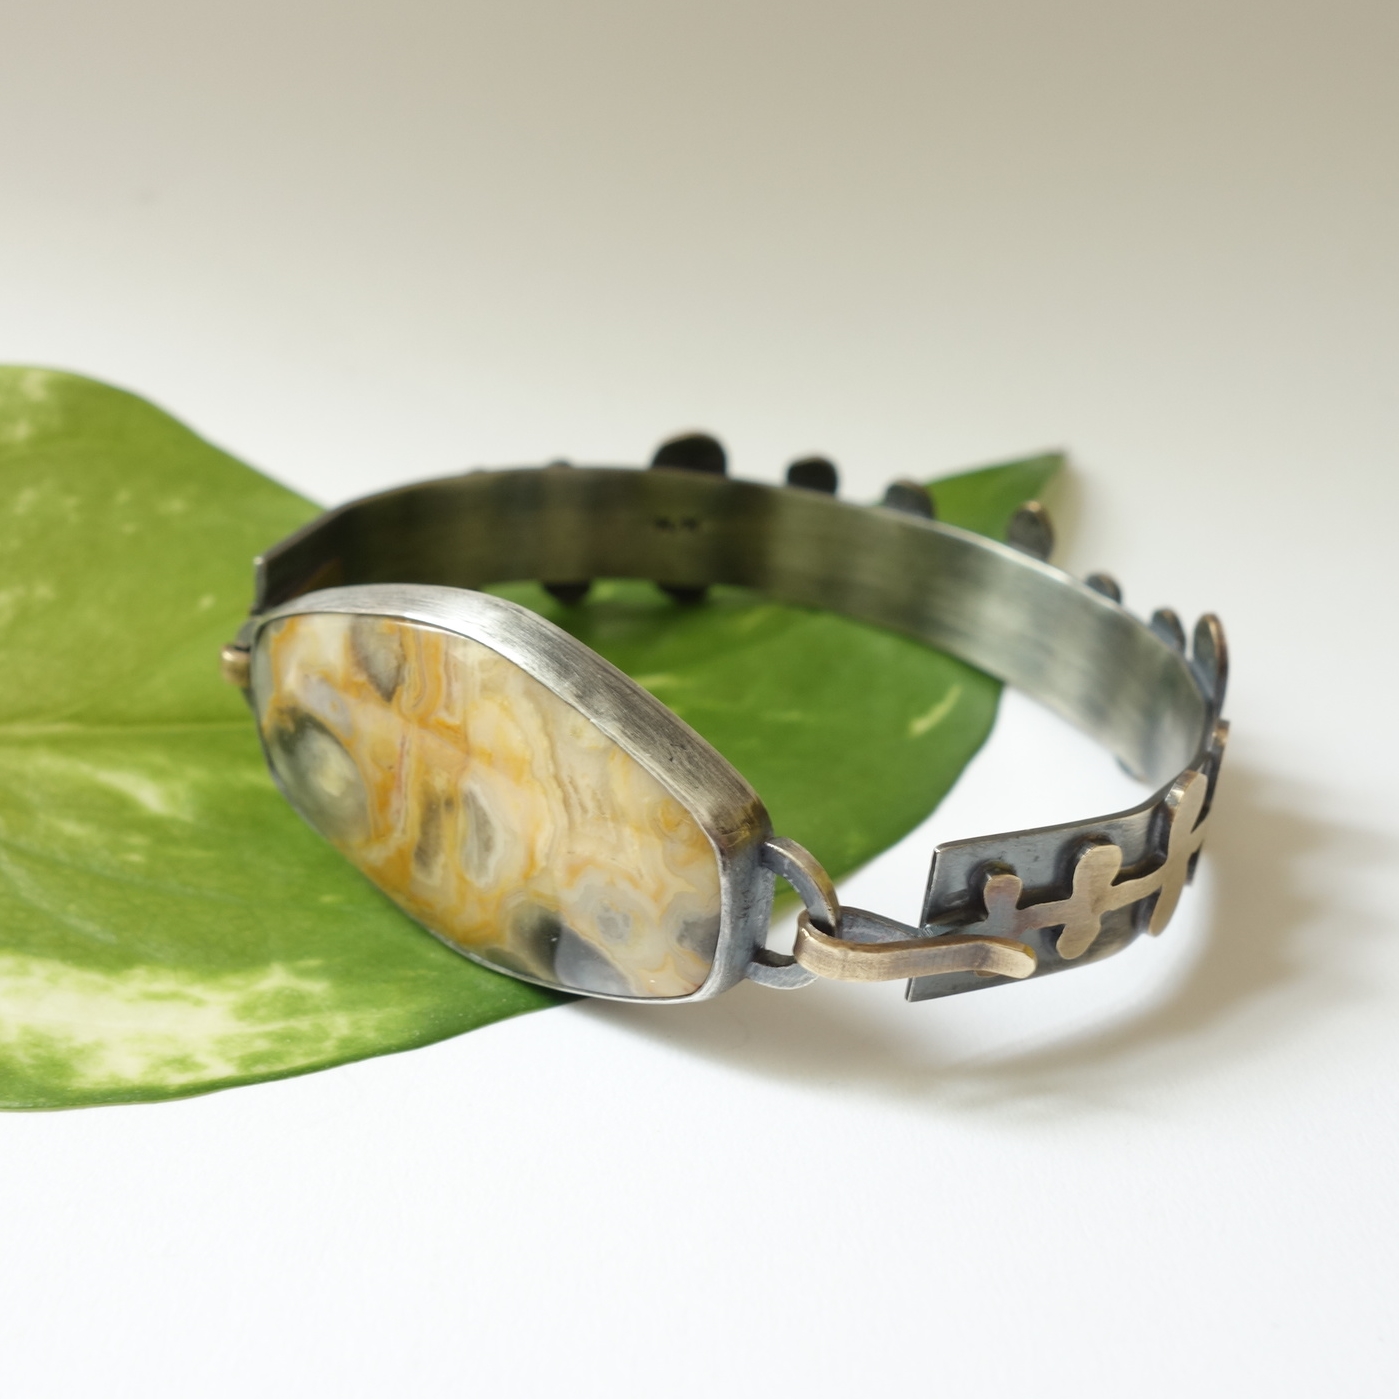
I loved making this cuff.  Nick gave me creative freedom and I just ran with it.  The main stone is Crazy Lace Agate from Pilbara, Australia and it pretty much sums up Christina's personality perfectly. 

Crazy Lace Agate is called the Laughter Stone, or "Happy Lace." It is associated with sunny Mexican fiestas and dancing.  It brings joy to those who wear it. It is not a stone of protection, but instead of support and encouragement, elevating thoughts and promoting optimism. 

Each piece of this bracelet was fabricated and created by hand.  The brass details used as a subtle but functional embellishment were designed and hand cut to resemble a stylized and whimsical fern leaf.  The bracelet can be adjusted to fit by slightly bending the band. It easily opens and closes using a gentle squeeze releasing the hook and latch mechanism. 

-Kelly

MeritMade Commentaries - NOT THIS YEAR!!


Oh no it’s already AUGUST! Holy moly where has the summer gone? Our thoughts are shifting towards fall and back to school. The hot summer days are numbered. For me this means that I have to start thinking about DUN DUN DUUUUN!!!, the holiday.

As someone who ultimately produces goods to sell, the holiday season is one of the most productive and crazy times of year. Jewelry is a popular gift item, and I would be a moron not to have jewelry made and accessible to the buyer. Yep, that is you! I remember last year, I spent every night at the studio. I didn’t have a plan. All I knew is that if I could just keep making stuff, I would be OK. By the end of it, I was completely burnt out.

Looking back, I’m glad I worked that hard, but did it really need to be so stressful. I could have genuinely benefited from a goal and furthermore a plan to reach that goal. For those of you who know me personally, you know that goals and plans are probably two of my biggest weaknesses. I’d rather fly by the seat of my pants. See where the wind takes me. You know, live life as an adventure! The unknown/unplanned, although fun, is just not going to cut it this year! So I'm going to do it. I'm going to go against all of my internal being and I am creating a plan! And dangit, I'm going to do my best to stick to it.

The first step of the plan is to make myself and my work more available. I refuse to start an etsy and drown in the sea of terrible jewelry, so that is out of the question. Facebook for business doesn't seem to be all that good at showing you my content unless I pay for it. Followers on instagram are awesome, but it's essentially useless if you want to post a link. So I'm taking matters into my own hands. I want to build up my mailing list. I want to supply to you all good content. I want for members of my mailing list to get the first chance to buy something, before anyone else. To be able to purchase a unique one of a kind piece of jewelry that will last a lifetime. I'm even considering making a members exclusive line. I want for shopping and working with me to be as easy, awesome and fabulous as possible.

xo, meritmade 

MeritMade Lessons - How did you make that?


He who works with his hands is a laborer.
He who works with his hands and his head is a craftsman.
He who works with his hands and his head and his heart is an artist.
― Francis of Assisi
Whimsical Fern Bracelet kansas city merit made meritmade kc handmade jewelry art jewelry unique jewelry
Whimsical Cuff Bracelet kansas city merit made meritmade kc handmade jewelry art jewelry unique jewelry

I'm often asked how I make my jewelry. How do you get the stone to stay there? What is that made of? How did you make that ring band a perfect circle?

I love these questions. It gives me an opportunity to talk about why I love what I do, and what makes it special. Like any good craft you are not an expert overnight. Actually you are never an expert, there is always something new to learn or try, but to become good, it takes training and LOTS of practice.  

When you look at my jewelry none of this training or practice is evident. Dirty hands, gross chemicals, hammers, files, technique, etc. all of that happens behind the scenes, but it is a very important part of the process. If you know how I make something, then you can appreciate the effort that is required. In an attempt to show part of this process, I recently made a few videos. 

This is just a small part of the process, but I really enjoyed making these. I hope you enjoyed watching them because I plan to show you even more in the future.

xo, Kelly

P.S. Are there any requests? What things are you interested in seeing me do?